Shower leak? Check for failed waterproofing before you re-tile
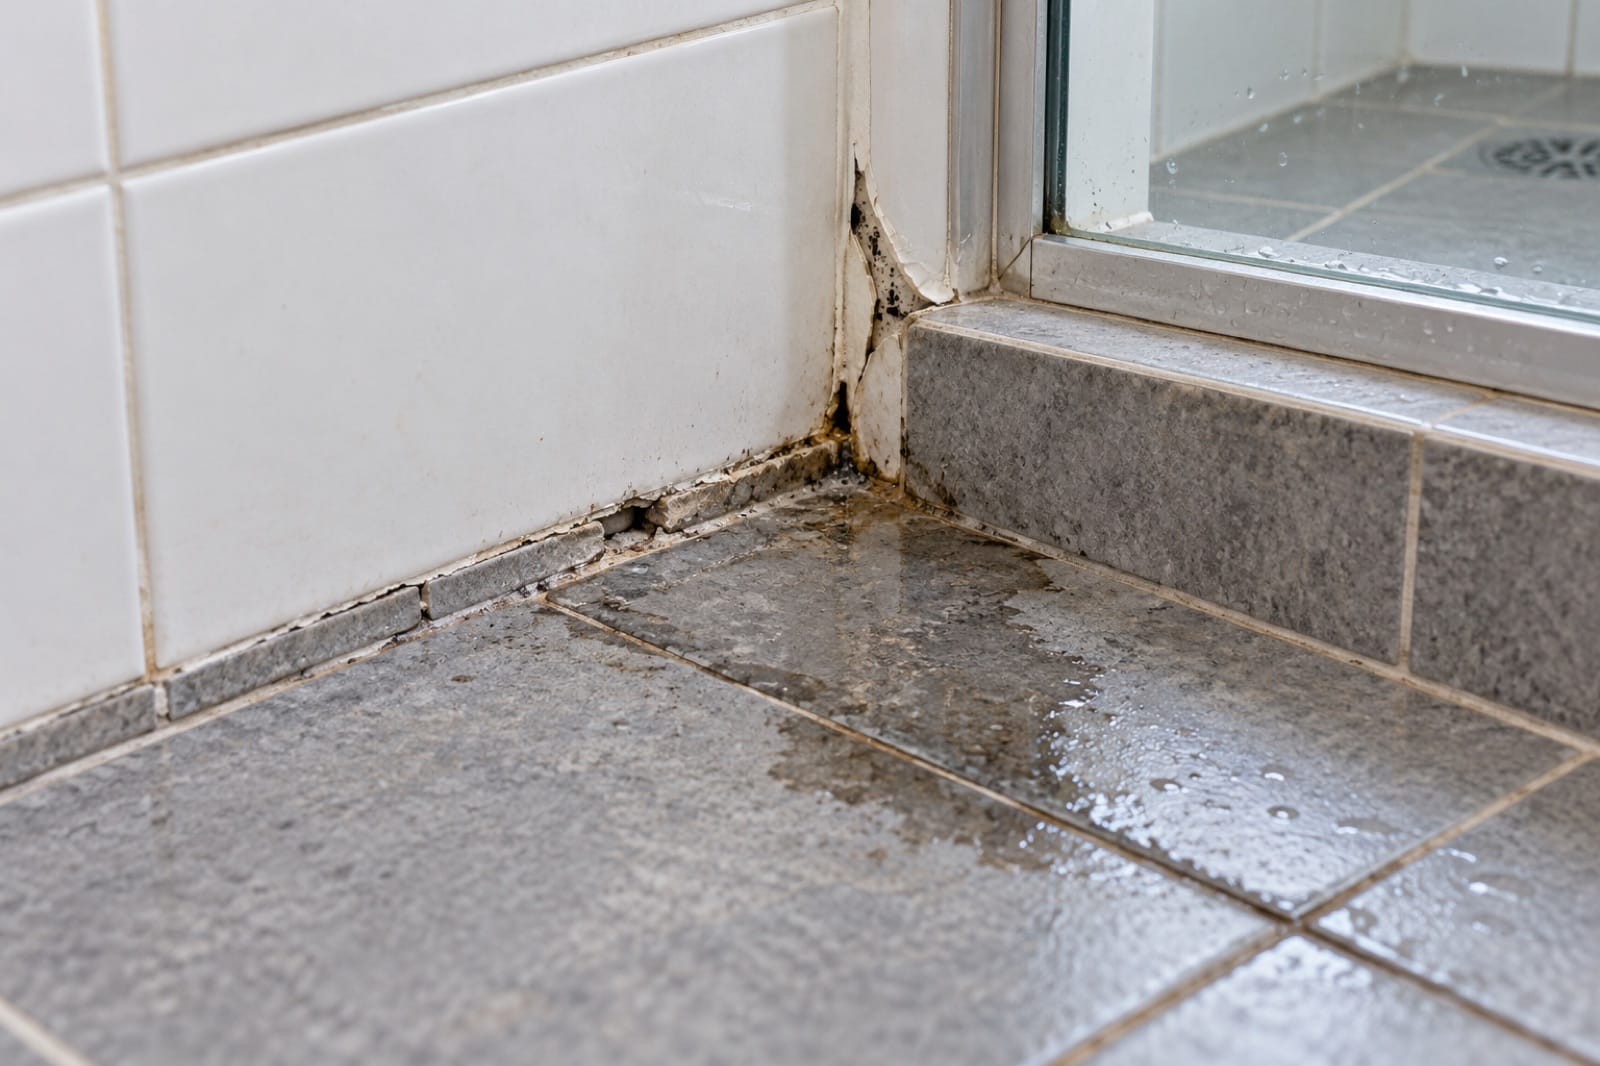
The grout along the bottom of the shower keeps cracking. The baseboard in the bedroom next door has started to swell. There's a musty smell in the hallway that airing doesn't fix. It's tempting to treat it as a small shower leak: regrout, run a new bead of silicone and call it done.
Short answer: Most shower leaks come from grout and silicone, a failed waterproofing membrane or shower pan, or the pipes and valve. Test each one with water on its own, then check the other side of the wall with a thermal camera and a moisture meter. Regrouting fixes only the first; a failed membrane usually means lifting tiles.
Sometimes regrouting is the fix. But if the waterproofing membrane under the tiles has failed, new grout only hides the problem while water keeps soaking into the wall and the floor. Before you spend money on re-tiling, find out which one you're dealing with. Here's how, in the order we'd do it.
What causes a shower leak?
Tiles and grout look waterproof, but they aren't: grout is porous, and some water gets through it every time you shower. What keeps the water in is the waterproofing membrane underneath, a coating or sheet on the floor and up the walls, sealed around the drain and the corners, that sends that water back to the drain.
There are three common sources of a shower leak, and they need different fixes:
| Source | Typical signs | Who fixes it |
|---|---|---|
| Grout and silicone | Cracked grout, mold in the silicone, water marks only right at the edge of the shower | Often DIY |
| Failed membrane or pan | Damp in the wall or floor outside the shower, swollen baseboards next door, hollow or loose tiles | A licensed waterproofer or contractor |
| Pipes and the valve | Damp whenever the faucet runs, even when the water doesn't hit the walls or floor | A licensed plumber |
How can you tell if a shower is leaking behind the wall?
Allow about 10 minutes, and it's free. Walk around the shower and the other side of every wall it shares:
- Swollen baseboards or door frames in the bathroom, the hallway or the bedroom next door.
- Bubbling or flaking paint low on a wall that backs onto the shower.
- Grout that stays dark for hours after a shower, or crumbles when you press it.
- Hollow tiles. Tap the floor tiles with the handle of a screwdriver. A hollow sound where the rest sound solid can mean water under them.
- A musty smell or damp carpet near the shared wall.
- Stains on the ceiling below, if the bathroom is upstairs.
How do you find a shower leak with a water test?
This 30-minute test separates the three sources. Do each step on its own, with no one using the shower, and wait about 15 minutes between steps.
- Pipes and valve: turn the shower on, but catch all the water in a bucket so none touches the walls or the floor. If damp appears now, it's the pipes or the valve.
- Floor and drain: run water only onto the shower floor for 10 minutes, keeping it off the walls.
- Walls and corners: spray the walls, the corners and the door seals for 10 minutes.
After each step, check the other side of the walls and the floor outside the shower. Water that shows up after step 2 points at the floor membrane or the drain. After step 3, at the wall membrane, the corners or the door.
The shower pan leak test
If step 2 points at the floor and you have a pan or a tiled base, a flood test gives a clearer answer. Block the drain with a test plug or a sealed balloon, fill the base with an inch or two of water, and mark the level with tape. Leave it for several hours, and stop at once if damp appears outside the shower or on the ceiling below. A level that drops, with no drips around the plug, points at the pan or the membrane.
Can a thermal camera show a shower leak?
It can show the wet patch a leak leaves behind, and a scan takes about 5 minutes. The most useful time is about an hour after a long shower, or after the water test. A thermal camera doesn't see water, but wet drywall and wood cool as the water evaporates, so a wet area shows as a cold patch. (Straight after a hot shower it can read warm instead; give it time.)
Scan these, from a few feet back:
- The wall on the other side of the shower, low down, especially in the corners.
- The floor outside the shower, along the shower edge and in front of the door.
- The ceiling below, in a two-story house.
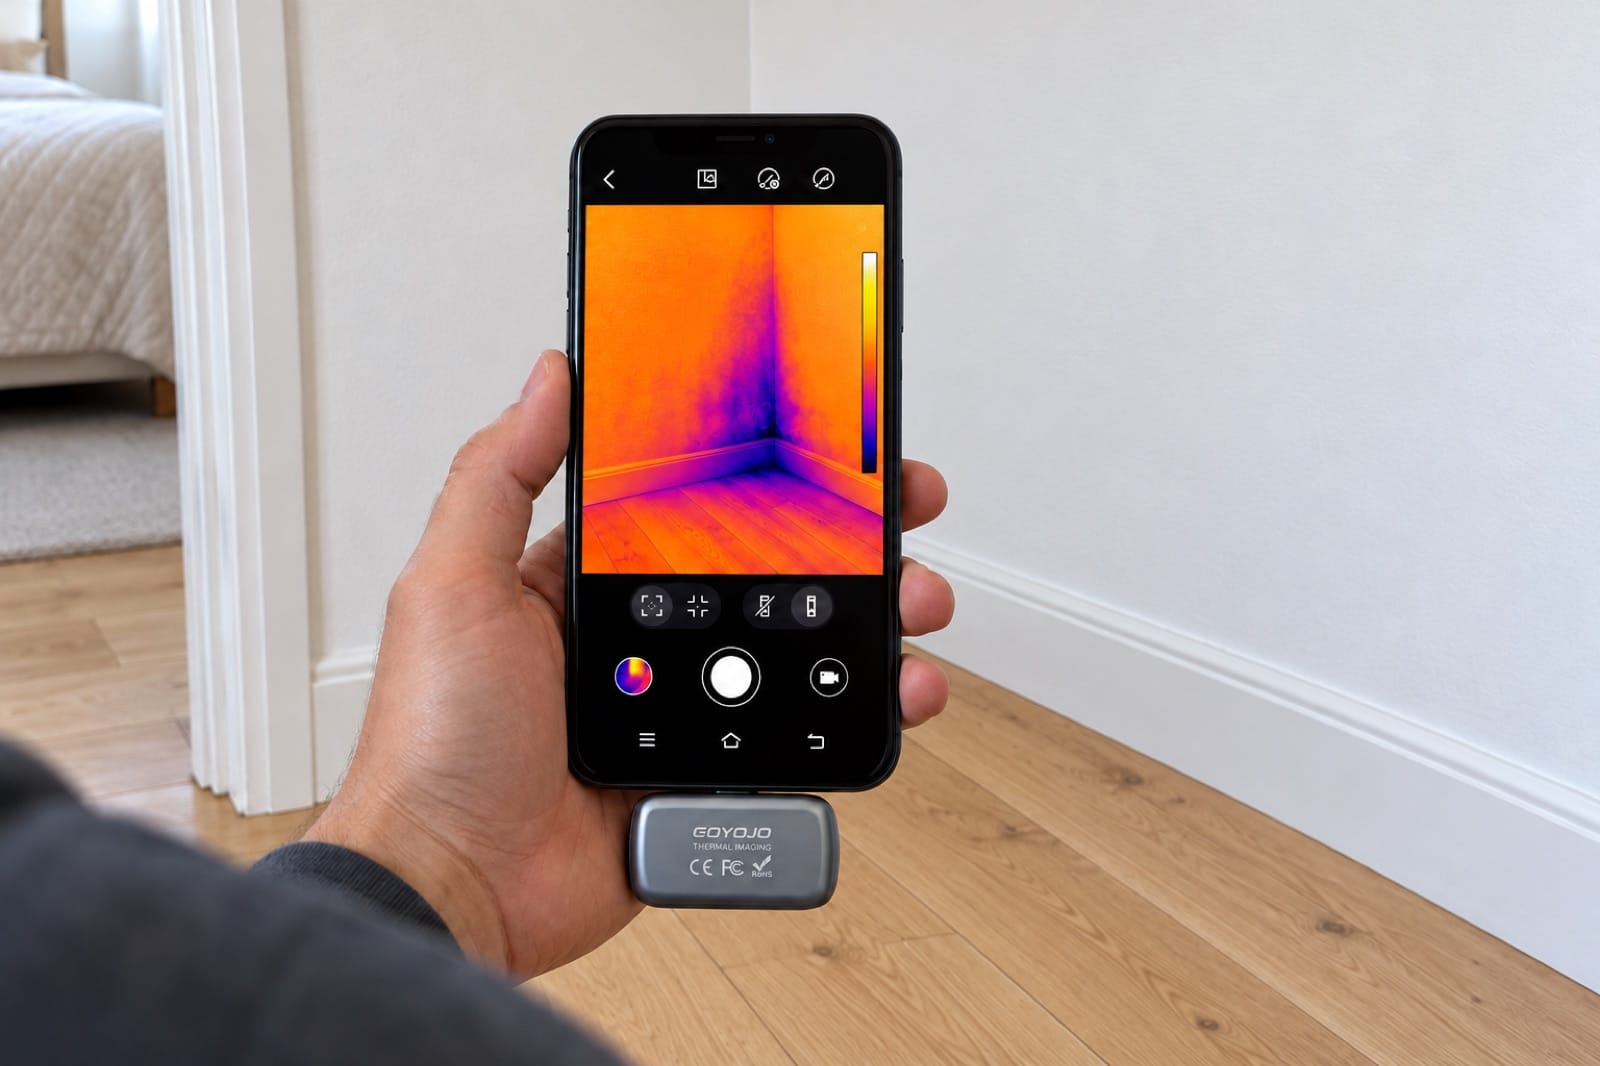
Illustration: an hour after a shower, the wall on the other side shows a cold, wet patch rising from the floor. The paint looks normal.
A cold patch that starts at the floor and fades upwards, in line with the shower, is the classic sign of water escaping through a failed membrane. A patch that follows the line of the pipes points at the valve. With Spark Pro you see the whole shared wall in one frame and the shape of the patch is clear; with Spark, work closer.
Things that fool people: exterior walls and corners are often cooler anyway, and tiles and chrome reflect heat. Scan the painted drywall and the baseboards, not the tiles. More on that in how to read a thermal image.
Is the cold patch really damp?
A cold patch can be damp or just a cold wall. A pinless moisture meter like Damp tells you which in about 5 minutes.
- Take a reading on a dry part of the same wall, well away from the shower. That's your reference.
- Move along the bottom of the wall toward the shower, about 4–6 inches above the baseboards, and then up the wall.
- Readings that climb steadily toward one area point at your leak. Mark the wettest point with painter's tape and check it again in a week.
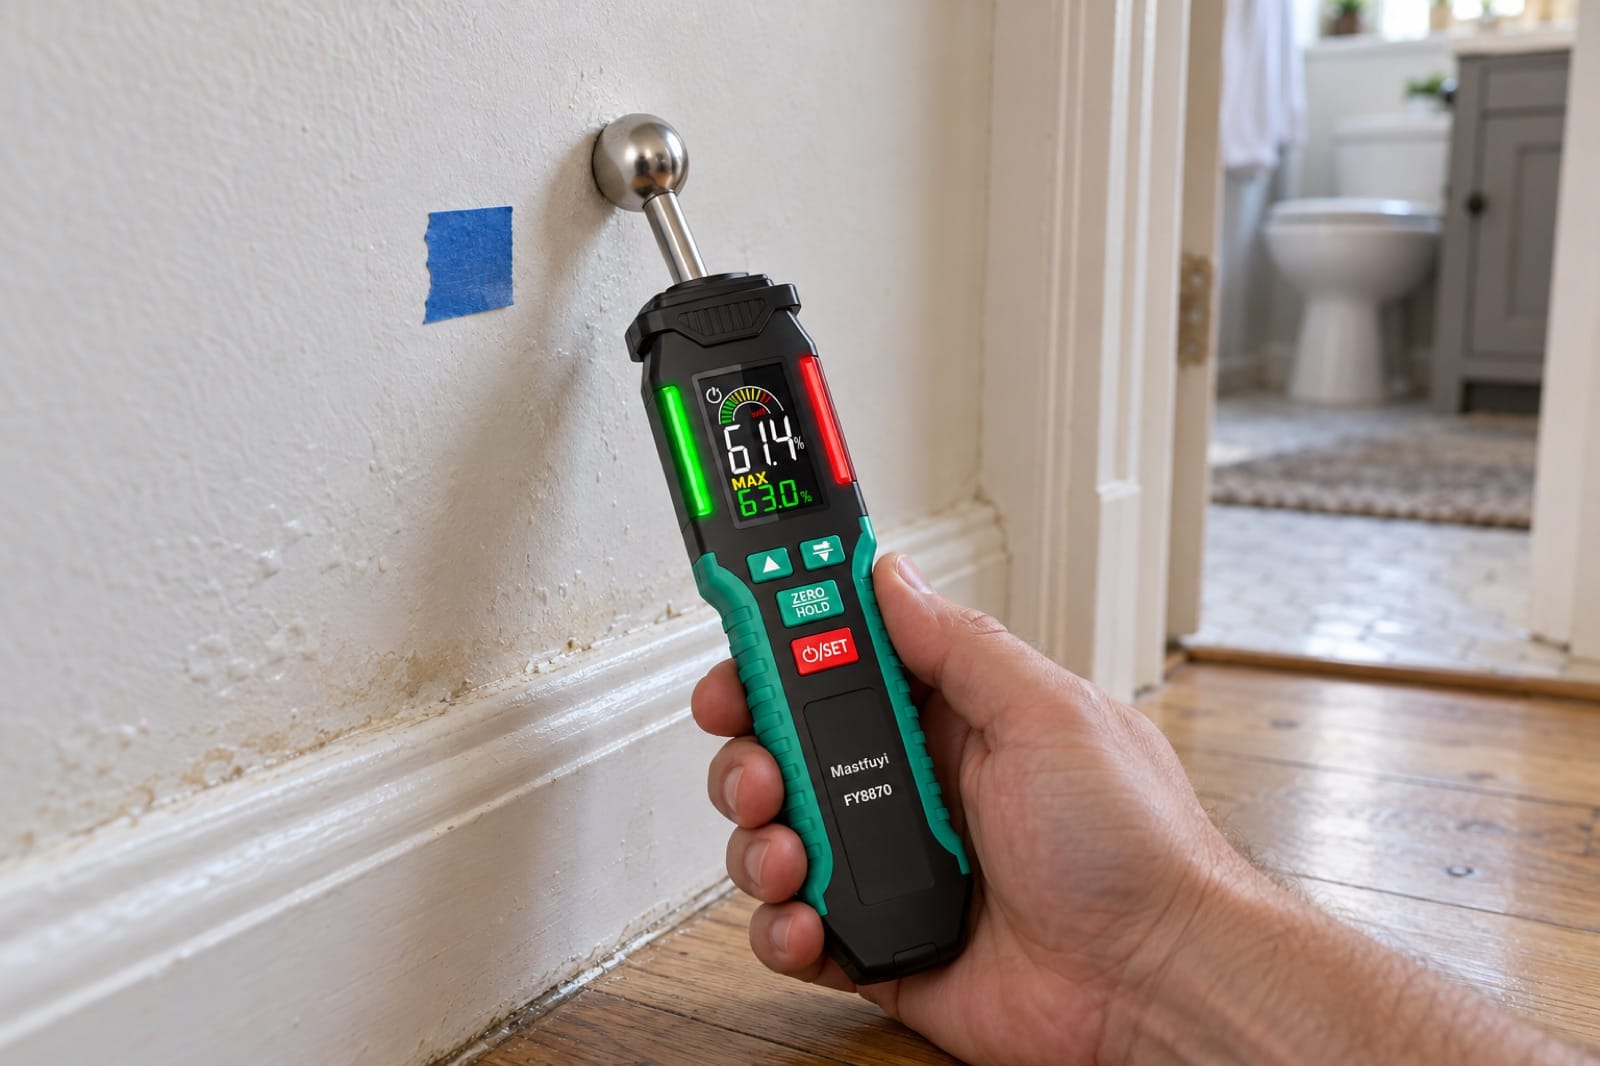
Illustration: the meter confirms the cold patch is wet. Compare it with a dry part of the same wall, and tape the wettest spot.
Know what the meter is reading. Metal behind the surface makes the numbers jump: corner beads, nails, nail plates, pipes and the metal mesh in some floors. Tiles and stone also read differently from drywall. So compare readings only on the same material, move slowly, and trust a pattern across several readings, not one high number. On the tiled floor, readings help only when you compare them with tiles in a dry part of the room.
How do you look behind the tiles without lifting them?
An inspection camera can look behind the tiles through openings that are already there, in about 10 minutes:
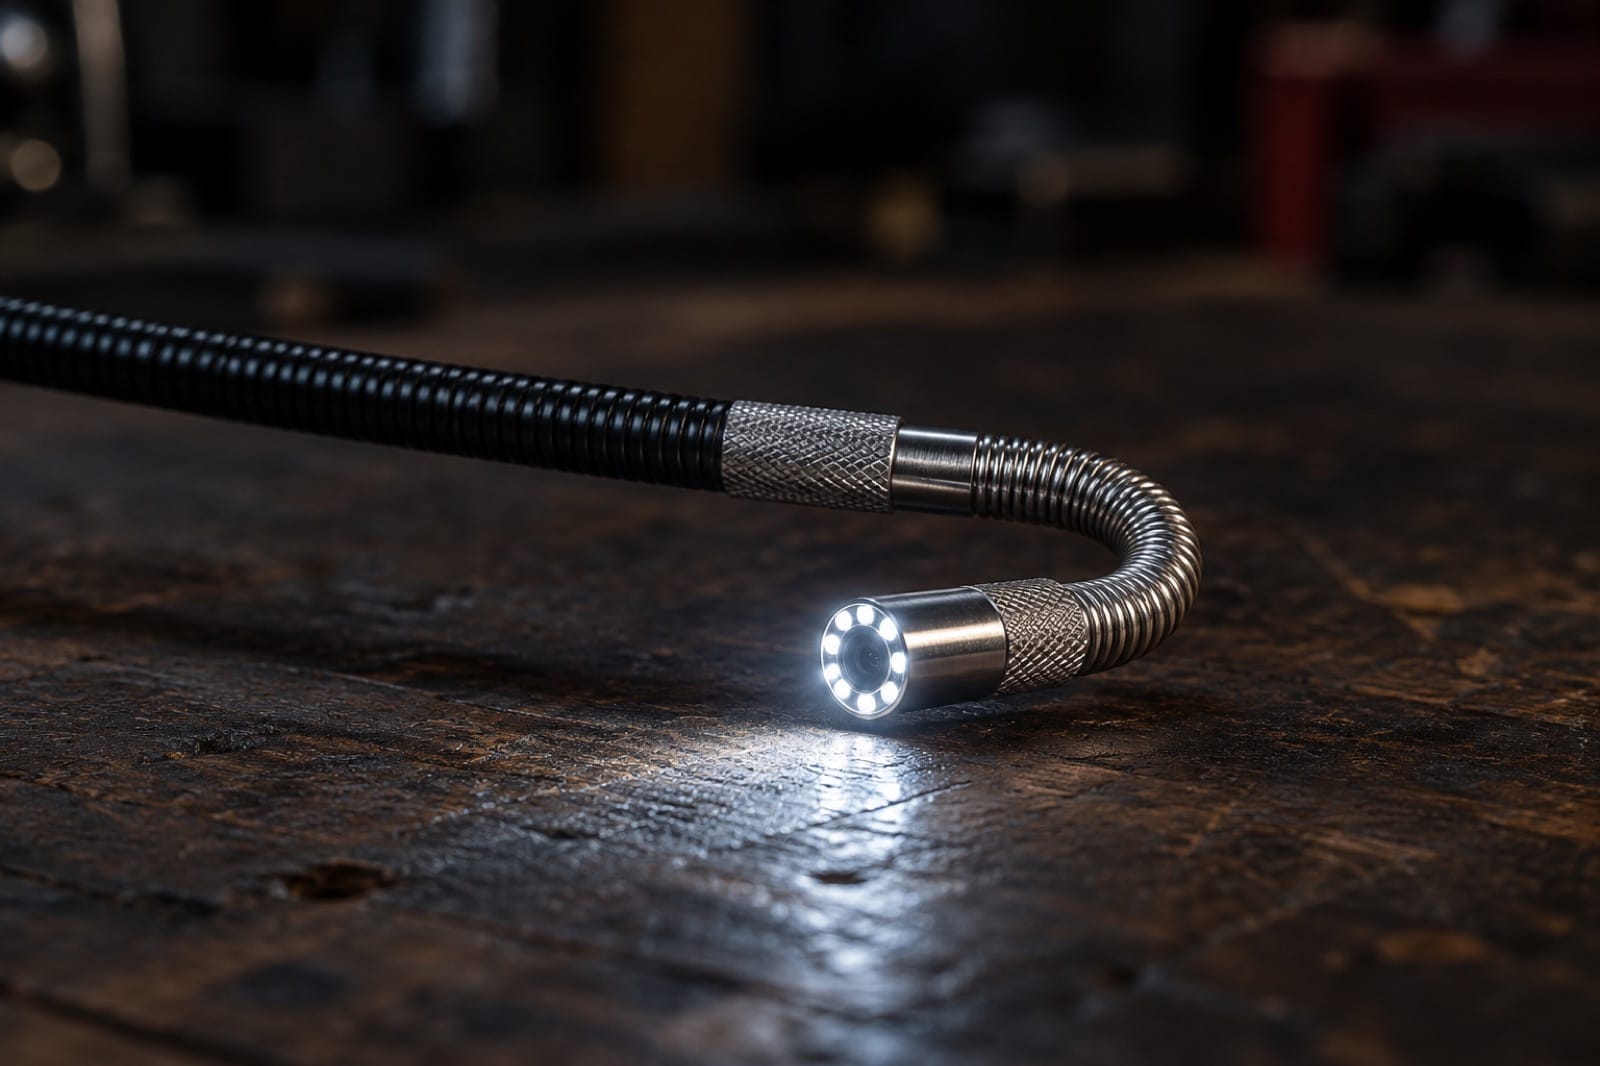
- Behind the valve. Unscrew the trim plate of the shower valve. There's usually a gap around the valve body, big enough for the 6.2 mm tip of Reach 360. Don't unscrew the valve itself.
- The tub access panel, if the shower is over a tub.
- Under the vanity, where the pipes come through the wall.
- From the crawl space or the room below, if you can reach under the shower.
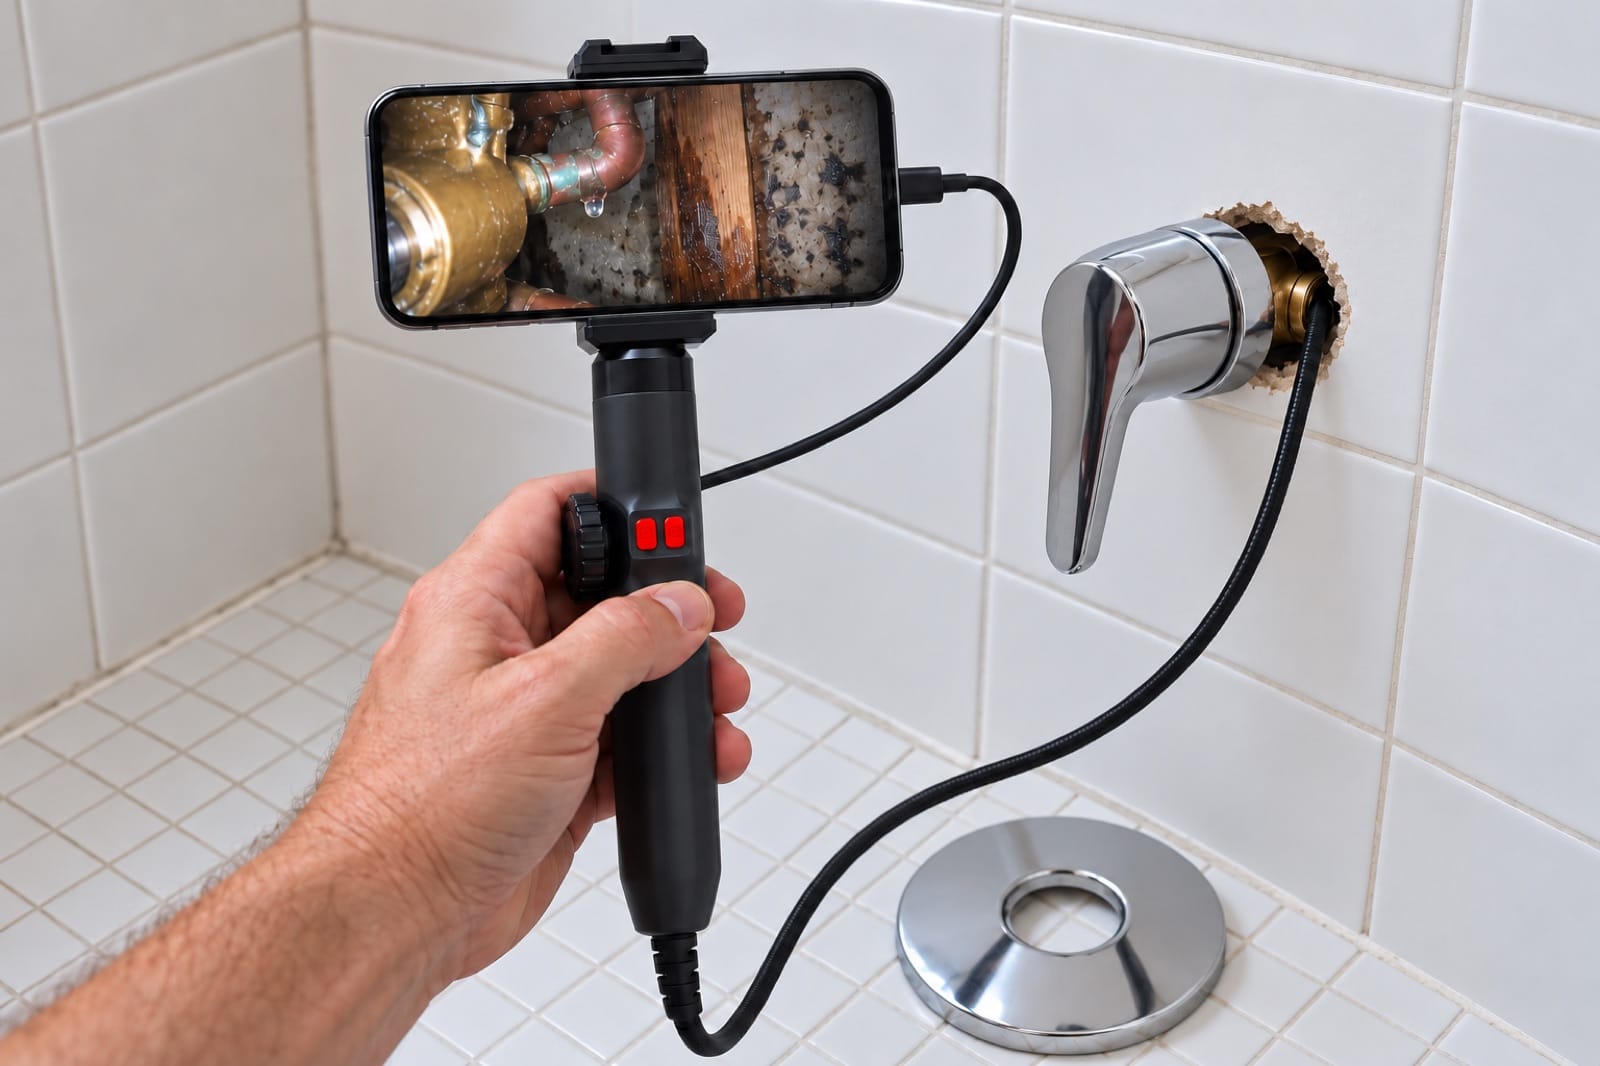
Illustration: with the valve trim plate off, the camera looks behind the tiles: a drip at the joint, a stained stud and mold on the backer board.
Steer the tip up and down the cavity and look for dark wet wood, black mold on the back of the wallboard, drips at pipe joints and water marks down the studs. A dry cavity behind a damp wall points back at the floor and the drain. Our page on inspection cameras for plumbing has more on what these cameras can reach.
What can you fix yourself, and what can't you?
Usually DIY:
- Regrouting cracked or crumbling grout, then sealing it.
- Cutting out moldy or peeling silicone and running a new bead at the floor-wall junction, the corners and around the door.
- Replacing a worn seal on the shower door.
Not DIY:
- A failed membrane. Waterproofing is a job for a licensed waterproofer or contractor (in most places this is required by law). It usually means lifting the tiles.
- Leaks from pipes or the valve. A licensed plumber (in most places this is required by law).
If you regrout and the damp next door keeps coming back, the membrane is the likely cause, and more grout won't fix it. Wet wood also attracts termites, so a long-running leak is worth checking for them too (see our termite guide). For mold on the other side of the wall, our damp and mold guide covers the cleanup. If you suspect a leak somewhere other than the shower, start with how to find a water leak in a wall.
If you rent, report it to your landlord in writing with photos and your readings.
Common mistakes with a leaking shower
- Sealing over wet grout or silicone. The new layer traps the water and hides what's happening underneath.
- Testing everything at once. With water hitting the walls, floor and drain together, you can't tell which one let it through.
- Checking too soon. Water can take time to reach the other side of a wall, so look again after each step.
- Re-tiling first. New tiles over a failed membrane leave the real problem in place.
Frequently asked questions
Where is the most common place for a shower to leak?
Often where different parts meet: around the drain, in the corners, along the joint between the walls and the floor, and at the door seals. Grout and silicone in those spots take the most water and movement. Pipe joints behind the valve are another common source. A water test that wets one area at a time is the simplest way to narrow it down.
Do you need a plumber to fix a leaking shower?
It depends on the source. Grout, silicone and door seals are often DIY jobs. A leak from a pipe or the valve needs a licensed plumber, and a failed membrane needs a waterproofing specialist or contractor. The water test helps you call the right person first. Bring your photos and moisture readings, because they show exactly where the damp is and when it appears.
Does home insurance cover a leaking shower?
It depends on your policy and on how the damage happened. Many policies treat sudden water damage differently from a slow leak that built up over time, and the repair itself may be treated differently from the damage it caused. Ask your insurer or read the wording before any work starts, and photograph the damage and your readings first.
Why is my shower head dripping when the water is off?
A little dripping just after you turn the shower off is often water draining from the head and pipe above the valve. If it keeps dripping, a worn washer or cartridge in the valve is a common cause, and mineral buildup can add to it. Replacing valve parts can be a DIY job on some models, but call a licensed plumber if you're unsure.
How do you stop a shower head leaking at the connection?
Unscrew the head, clean the threads, check the washer inside and replace it if it's flattened or cracked. Wrap the threads of the shower arm with plumber's tape in the direction they tighten, then screw the head back on snugly. If water still escapes, or it's coming from the wall behind the arm, stop using the shower and have a plumber check it.
The tools in this guide
Prices are on each product page, in your local currency.
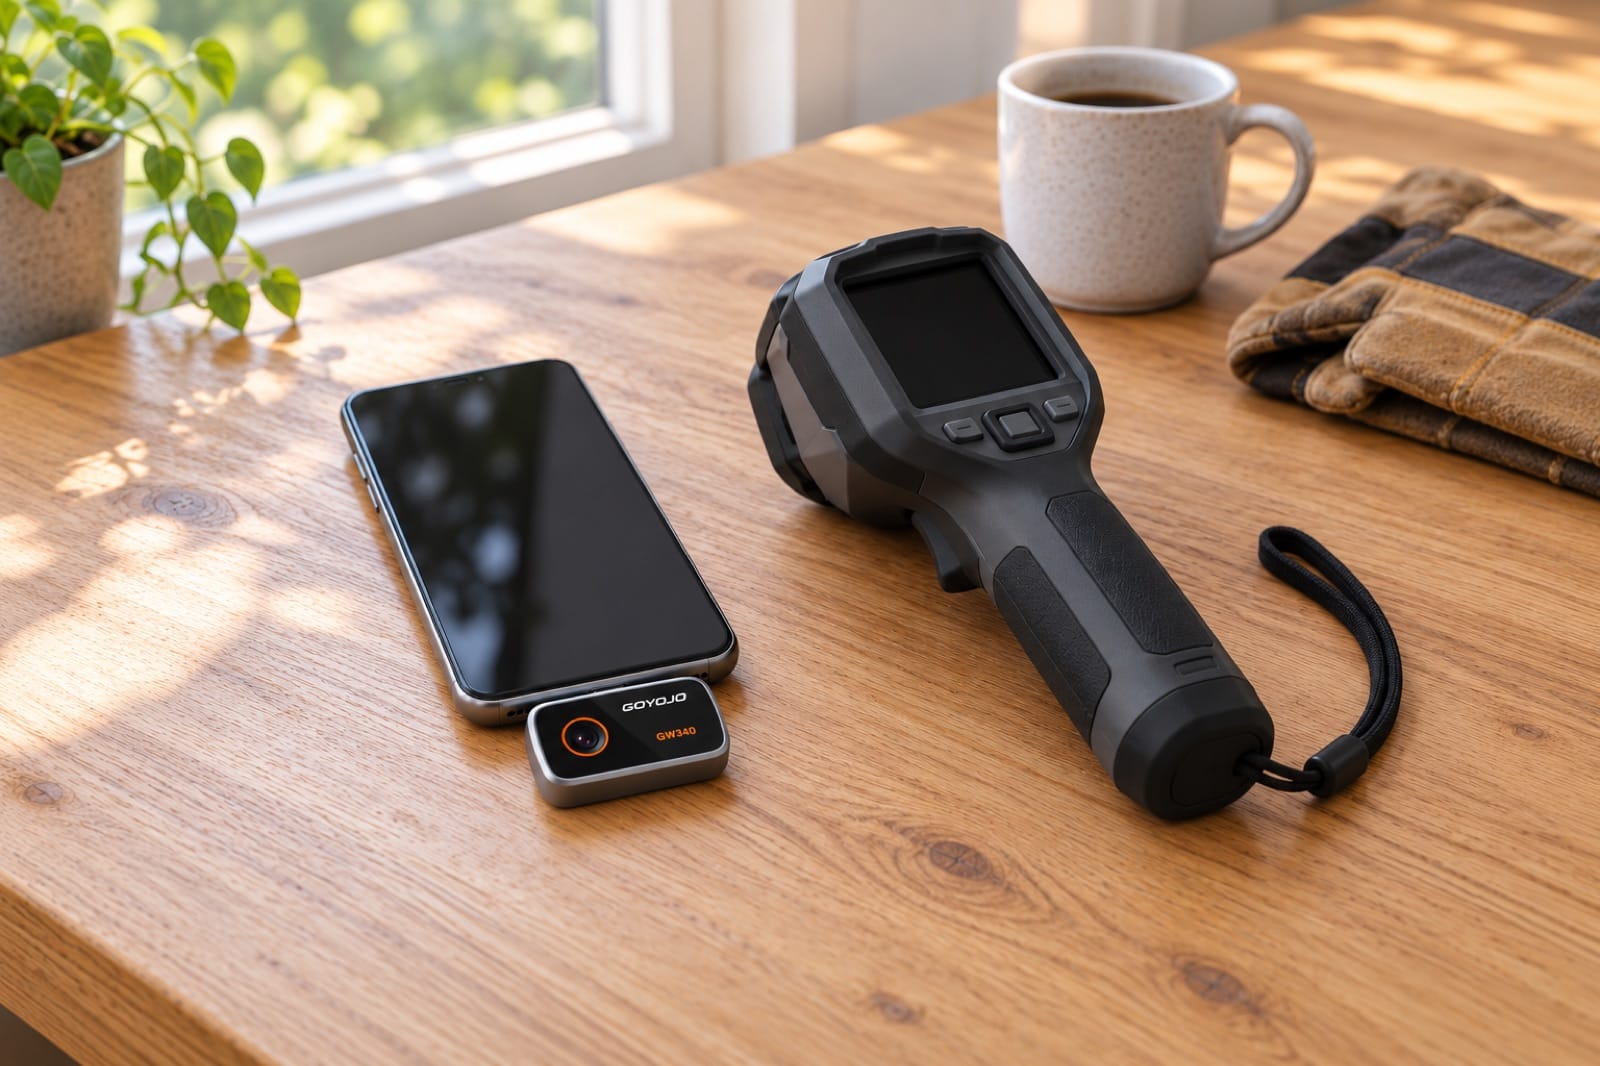
- Spark Pro — shows the cold, wet patch across the whole shared wall or floor in one frame.
- Damp — pinless moisture meter, reads 5–40 mm into drywall, wood and cement.
- Reach 360 — a 6.2 mm tip that bends up to 180° each way, to look behind the valve or under the tub.
All three together are our Whole Home Kit: find it with heat, confirm it's water, then look inside. 10% less than buying them separately.
Know what's leaking before you pull up a single tile. Order the Whole Home Kit, or start with Spark Pro.